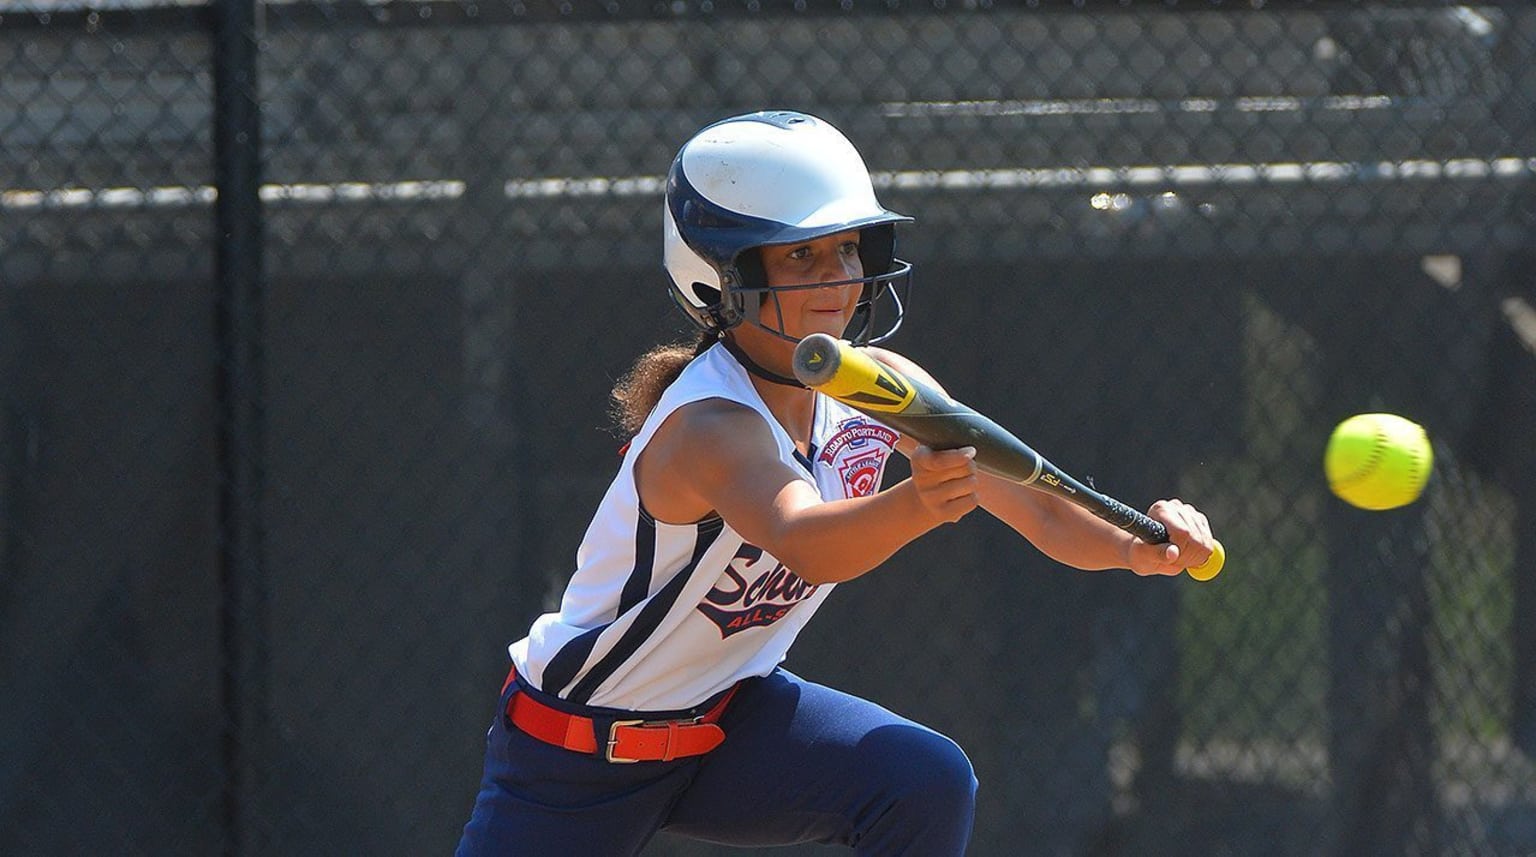
With so many of the highlights you see on TV focusing on home runs, and slugging percentage becoming a statistical priority, the skill of bunting has become a forgotten part of the game. The ability to properly execute a bunt can grow a young player’s confidence in the batter’s box, while developing a useful skill that can have as much of an impact on the outcome of a game as a home run.
The offseason, especially when the weather is cold, is a great time to develop the proper bunting technique. Practice can be done inside, with limited space, using only a bat (could be plastic) and a softer ball.
There are different styles of bunting. Many parents may have learned to bunt by adjusting their batting stance so that the back leg is moved toward the pitcher, placing the back foot almost parallel to their front foot in the batter’s box, which basically positions the hitter’s chest toward the pitcher. That is still a popular method of bunting. However, for this Backyard Tip, we’re concentrating more on hand, hip, and bat positioning.
To begin, it’s important to get back to basics, even if your Little Leaguer® has been in the program for a few years. ’Let’s begin with the concept of “up, up and up.”

Position 1
Position the batter forward or “up” in the batter’s box. This allows the batter to catch the ball in front of home plate before it sinks too much, and allows them to keep the bat in “fair” territory. Holding the bat in fair territory creates a better opportunity for the bunted ball to land and stay in fair territory.
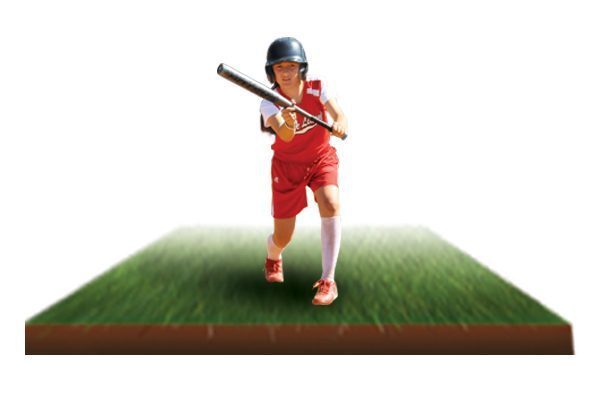
Position 2
Move “up” on, or closer, to the plate. Moving up on the plate allows the batter to have better plate coverage, and increases the ability to handle a pitch thrown on the inside half, or outside half of the plate. Be sure your Little Leaguer’s hands are “up” higher on the bat. Have your player spread their hands apart, placing the bottom hand toward the end of the bat, and the top hand in the middle of the barrel of the bat. The wider the grip, the more the bat “deadens,” or “catches,” the ball on contact. As your Little Leaguer’s hands move up the bat, have them “pivot” on the back foot to “open” the hips. This pivot motion will place the batter in an athletic hitting position.
After reviewing these two positions, begin with your Little Leaguer standing in front of a mirror, using a glove, shirt or ball bucket lid to represent home plate. With a helmet on and bat in-hand, have your Little Leaguer assume a regular, natural batting stance. When you say “pivot” instruct your Little Leaguer to execute the motions described in each of the tips.
Once your Little Leaguer’s timing and movements are comfortable and consistent, move the drill to your basement, garage or other open space. Introduce a softer ball like a Whiffle ball or Ping-Pong ball, into the drill.
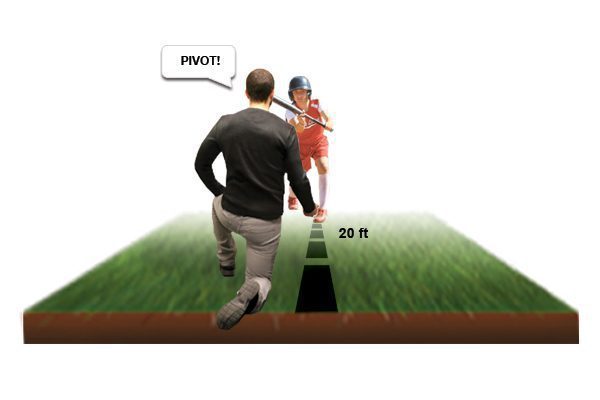
Step off a distance of approximately 20 feet in front of your batter, and proceed through each aspect of the drill. As you say “pivot,” add in an under-hand toss and encourage your Little Leaguer to “catch the ball with the bat” by “tracking” the ball to the bat with their eyes. Do not stab or swing at the ball. Repeat these steps several times, noting quality of contact with the bat, and where the ball goes. Slight adjustments may be needed to your Little Leaguer’s positioning in the batter’s box, hand placement and tracking of the ball.
Practicing this technique for a few minutes a day, can make the bunt a valuable tool for your Little Leaguer, and serves as a great offseason activity for you and your child.